

The Ultimate Guide to Touch Typing & Home Row Keys
Learn how to position your fingers on the keyboard, build subconscious muscle memory, and unlock 80+ Words Per Minute without looking down.
1. Home Row Keys & Proper Finger Placement
The Home Row is the horizontal center row on standard QWERTY keyboards where your eight fingers rest in idle position. It consists of the keys:
Pinky on A, Ring on S, Middle on D, Index on F.
Index on J, Middle on K, Ring on L, Pinky on Semicolon.
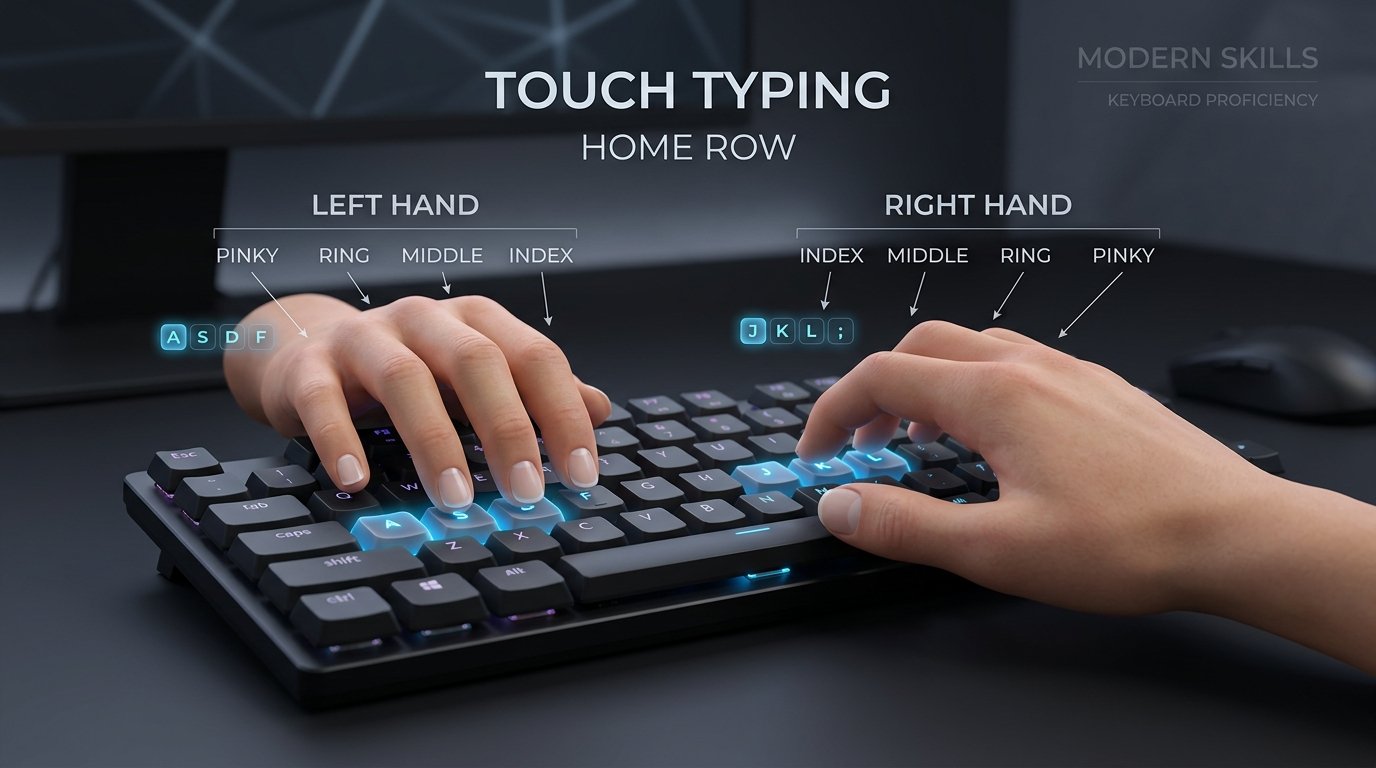
Notice how index fingers anchor on the F and J keys with tactile ridges, while thumbs hover freely over the Spacebar.
🔍 The Secret of the F & J Tactile Ridges
Almost every computer keyboard worldwide features small raised physical bumps or ridges on the F and J keys. These tactile landmarks were invented so your index fingers can locate home position by touch alone. You never need to glance down at the keyboard; your fingertips naturally snap into place!
2. Complete Finger-to-Key Assignment Matrix
Each finger is assigned a dedicated vertical territory. By keeping fingers confined to their designated zones, you eliminate finger collisions and maximize typing rhythm:
| Hand & Finger | Home Key | Upper Reach | Lower Reach | Number Row |
|---|---|---|---|---|
| Left Pinky | A | Q, Tab | Z, Shift | 1, ` (Tilde) |
| Left Ring | S | W | X | 2 |
| Left Middle | D | E | C | 3 |
| Left Index | F, G | R, T | V, B | 4, 5 |
| Right Index | J, H | U, Y | M, N | 6, 7 |
| Right Middle | K | I | , (Comma) | 8 |
| Right Ring | L | O | . (Period) | 9 |
| Right Pinky | ; (Semicolon) | P, [, ], \ | /, Enter, Shift | 0, -, = |
| Both Thumbs | Spacebar (Exclusively) | |||
3. Ergonomic Posture: Preventing RSI & Fatigue
High-speed typing requires physical stamina. Incorrect wrist angle and hunched posture lead to Carpal Tunnel Syndrome and repetitive strain injuries (RSI). Follow these medical workstation ergonomics:
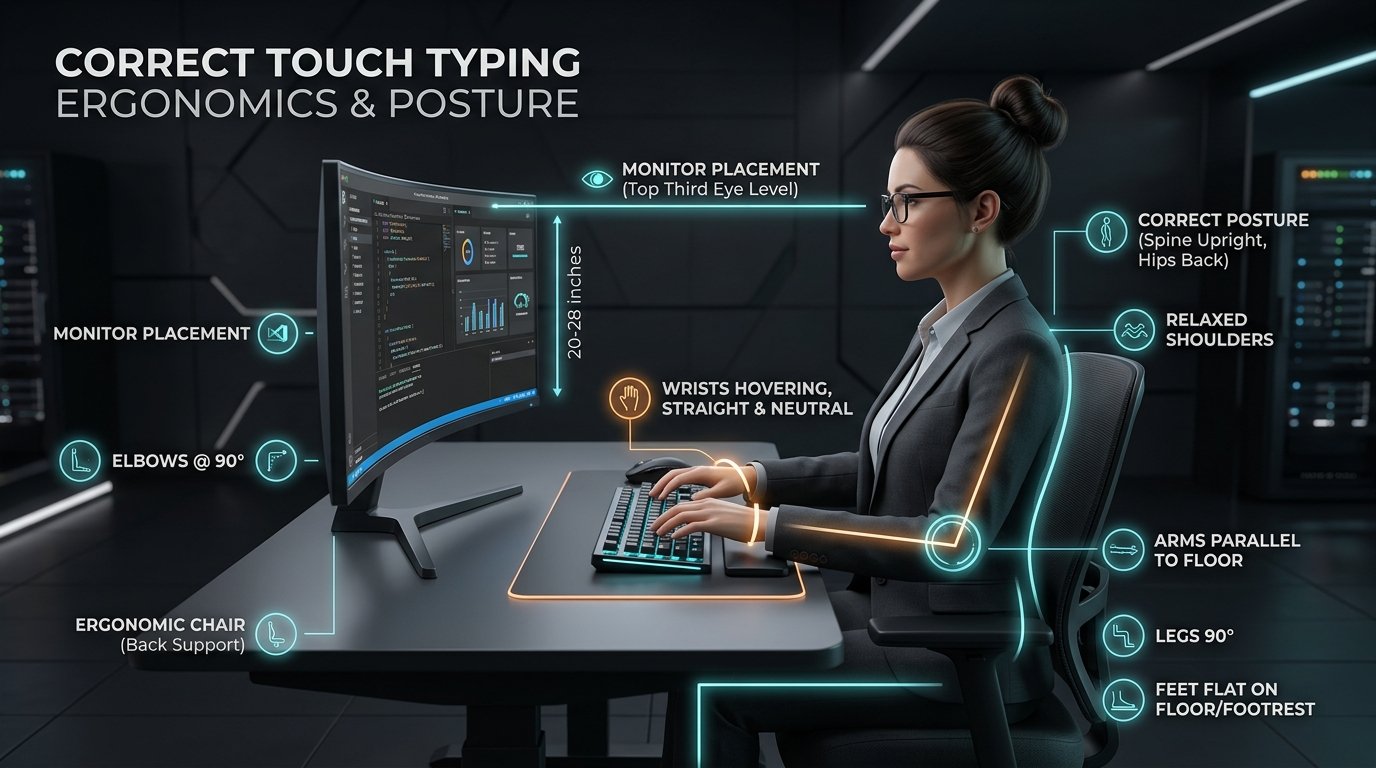
Elbows at 90°, wrists hovering neutral, spine upright with lumbar support, eyes aligned with the upper third of your screen.
Never rest your wrists flat against the desk while typing. Float your wrists slightly so your arms can pivot smoothly across rows.
Position your desk and chair height so your forearms rest parallel to the floor, forming a 90° angle at your elbows.
Position the top third of your display directly at eye level, approximately 20 to 28 inches from your face to prevent cervical neck strain.
Modern keyboards require only 45 to 60 grams of actuation force. Tap keys lightly like piano keys instead of slamming them down.
4. The 4 Stages of Touch Typing Mastery
Progression follows a predictable neuro-muscular curve. Expect temporary slowdowns as your brain rewires hunt-and-peck habits into muscle memory:
Stage 1: Cognitive Mapping (15 – 30 WPM)
You consciously think about which finger moves to which key. Accuracy will feel slow, but strict adherence to no-peeking is non-negotiable.
Stage 2: Automaticity & Word Bursts (35 – 55 WPM)
Common words like "the", "and", and "with" trigger as single muscle reflexes rather than individual letters.
Stage 3: Advanced N-Gram Fluency (60 – 85 WPM)
Your hands anticipate incoming words 2–3 tokens ahead on screen. Keystrokes become a fluid, continuous rhythmic stream.
Stage 4: Thought-to-Screen Flow (90 – 120+ WPM)
Total cognitive transparency. The physical keyboard dissolves; you simply think sentences and they appear instantly on screen.
Ready to Put Theory Into Practice?
Choose your skill level and practice with real-time on-screen finger guidance, instant accuracy feedback, and graduation certification.